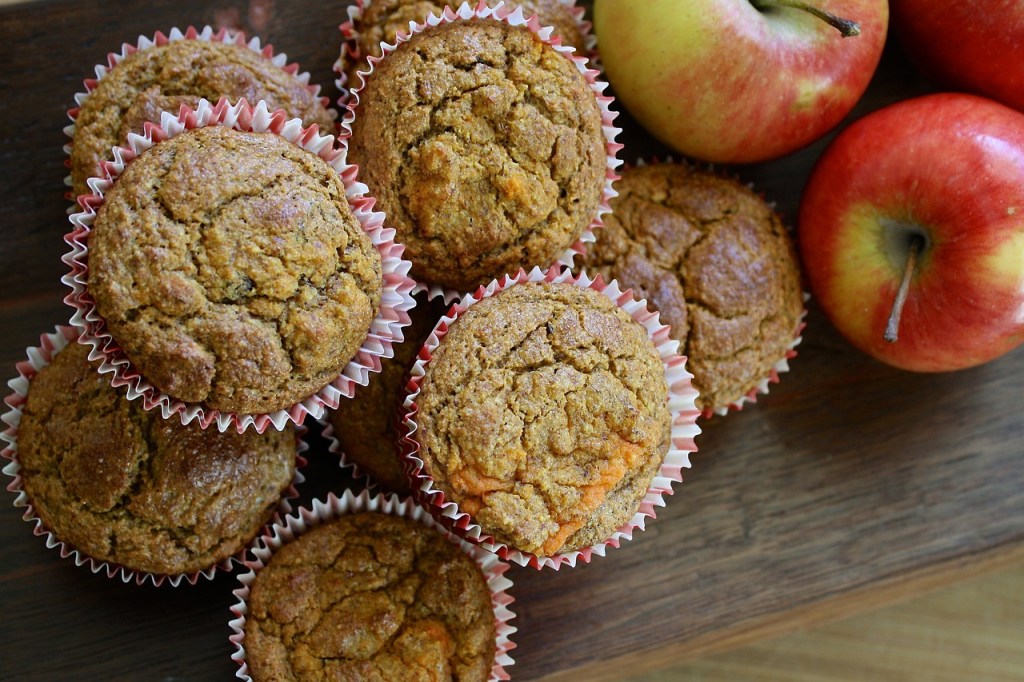
Combine the dry ingredients and set aside. Combine the egg, oil, milk, and orange rind. Mix well and add to the dry ingredients. Put batter into muffin tins. Sprinkle the topping over the batter. Bake at 400°F for 18 to 19 minutes. Remove from the oven and ice.
For the Topping:
Mix topping ingredients until crumbly.
For the Icing:
Combine the ingredients before drizzling over muffins.
3½ to 4 cups sifted Pillsbury’s Best All-Purpose Flour
Soften the yeast in warm water. Combine the butter, milk, salt, and sugar in a mixing bowl. Stir to melt the butter. Cool to lukewarm. Stir in the egg and softened yeast. Gradually add the flour to form a stiff dough. Knead on a floured surface until smooth and satiny (3-5 minutes). Place the dough in a greased bowl. Cover and chill for at least 2 hours. Roll out half of the dough on a floured surface to a 12-inch square. Place on a greased baking sheet. Spread half of the filling down the center of the dough. Diagonally cut at 1-inch intervals, herringbone fashion. Make cuts 3 inches long. Fold opposite strips of dough over the filling, crossing in the center. Seal ends of coffee cake. Repeat with the remaining dough.
Let rise in a warm place (85°F to 90° F.) until it doubles in size, about 1 hour. *
Bake in moderate oven (375°F) 15 to 20 minutes until deep golden brown. Spread with Icing while warm. To store or freeze, wrap in “quilted” Kaiser Heavy Duty Foil.
*”If you use Pillsbury’s Best Self-Rising Flour, omit salt and increase flour to 4 – 4½ cups. Increase rising time to about 1 1/2 hours.
** Dough may be stored in refrigerator for up to 4 days and baked as needed.
RAISIN-APPLE FILLING
In a saucepan, combine 2 ½ cups finely chopped, pared apples 1 cup seedless raisins, ground, 1 cup firmly packed brown sugar, ⅐ teaspoon Morton Sait and ⅐ teaspoon French’s Cinnamon. Boil for 4 minutes, stirring constantly. Cool.
SNOW-TOPICING
Blend together ½ cup sifted confectioners’’ sugar, ¼ teaspoon French’s Vanilla and 2 teaspoons milk until of spreading consistency.
This recipe was adapted by Gertude Phillips, who found the recipe in a Pillsbury collection of holiday recipes in the 1960s.
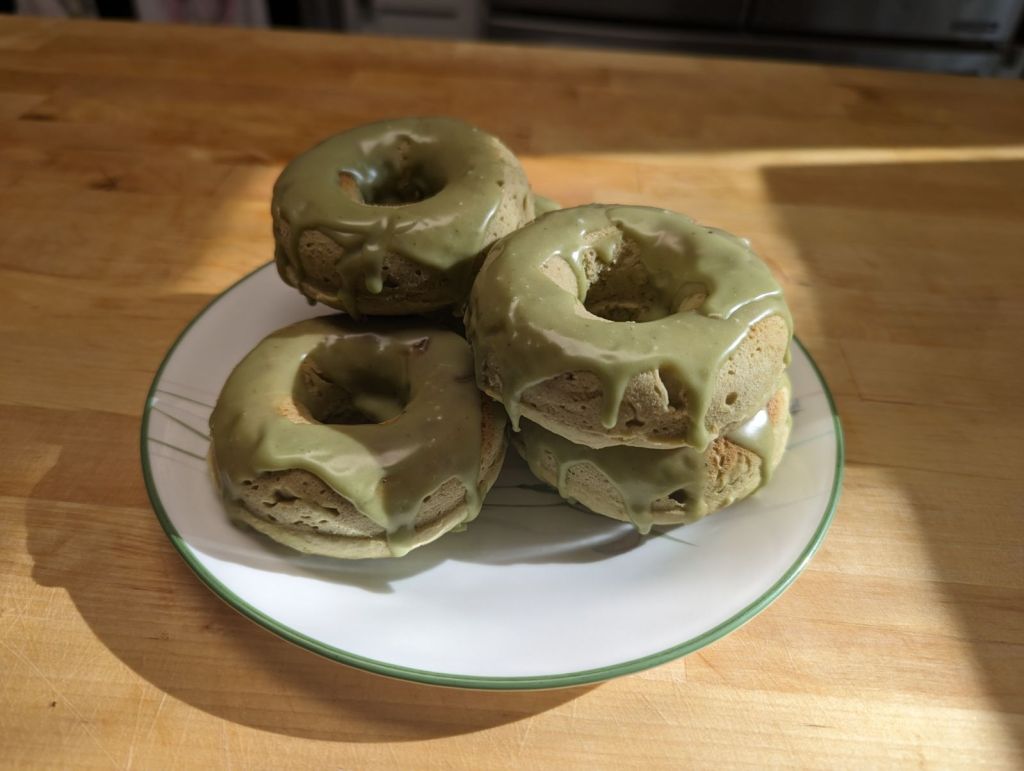
Matcha Baked Doughnuts Mix Makes enough for 6 servings
¾ teaspoon baking powder
⅛ teaspoon baking soda
½ teaspoon matcha powder
⅛ teaspoon nutmeg
Heaping ¼ teaspoon sea salt
In a small mixing bowl, combine the baking powder, baking soda, matcha powder, nutmeg, and salt. Place the mix in a labeled container with the name and date on them.
Matcha Green Tea Dougnut Glaze
½ cup powdered sugar
⅛ to ¼ teaspoon matcha powder, depending on desired shade of green
Mix everything together in a small jar. Label with the name and date before giving away.
Matcha Cane Sugar Mix
½ cup cane sugar
¼ to ½ teaspoon matcha powder, depending on desired green color
Matcha Powdered Sugar Mix
½ cup powdered sugar
¼ to ½ teaspoon matcha powder, depending on desired green color
Mix everything together in a small bowl before pouring into a container. Label the container with the name and the date before giving away.
¼ to ½ teaspoon matcha powder, depending on desired green color
⅓ cup melted coconut oil
Decorating option 3: Matcha Powdered Sugar Mix
Preheat the oven to 425°F and lightly grease one standard 6-hole doughnut pan. In a medium bowl, whisk together the coconut oil and sugar. Add the egg and whisk to combine. Add the Matcha Baked Doughnut Mix and vanilla and whisk to combine. Alternately add the flour and the milk, beginning with the flour, until thoroughly combined. The batter will be thick, and a spatula drawn through the batter should leave an indentation. Spoon the batter into the doughnut pan (it will be thick and sticky). Bake for 10 minutes. Remove from the oven and let sit for 5 to 10 minutes before removing from the pan. Remove from the pan and place on a wire rack to continue cooling.
Make the corresponding decoration:
Matcha Glaze: In a small doughnut-sized bowl, whisk together the powdered sugar and matcha powder, then whisk in the almond milk until smooth. Dip each doughnut in the glaze and let the excess glaze drip off.
Matcha Cane Sugar: In a small doughnut-sized bowl, mix the cane sugar and matcha powder. Add the melted coconut oil to a separate bowl and dip both sides of each doughnut first into the coconut oil, and then into the sugar mixture. The coconut oil helps the sugar adhere and it also produces the most fried-doughnut-like taste.
Matcha Powdered Sugar: In a small doughnut-sized bowl, mix together the Matcha Powdered Sugar Mix and matcha powder. Dip both sides of each doughnut into the sugar, tapping off any excess.
Note: Different types of matcha green tea might vary in bitterness and in color. Matcha Green Tea Ceremony Grade withstands the heat better than the other graded teas. The following are examples of Matcha Green Tea Brands: AIYA Matcha, Ippodo Matcha, and Jade Leaf Matcha.
PEACH CUSTARD PIE MIX (spice mix) Makes: enough for (1) 9-inch Pie
1 cup sugar
3 tbsps. flour
Dash of salt
1/2 Tsp. cinnamon
1 Tsp. Powdered vanilla
In a small-sized mixing bowl, combine all ingredients with a wire whisk or fork until well incorporated. Place the homemade mix in a container that has the name of the contents and the date the mix was made written on it.
PEACH CUSTARD PIE Preheat: 425℉, Makes: 1 (9-inch) pie
1 PEACH CUSTARD PIE MIX
2 eggs, slightly beaten
1 ½ cups milk
2 (14.5 oz) cans peaches, drained
2 (9-inch) unbaked pie shell
Preheat the oven at 425℉. In a medium-sized mixing bowl, combine the first four ingredients. Set aside. Place the peaches in the bottom of the pie shell cavity. Pour the custard over the fruit. Sprinkle the top of the custard layer with cinnamon.
Bake the pie in the preheated oven for 10-15 minutes before reducing the oven’s temperature to 375℉ for an hour or until done (golden brown).
All-butter Double-Crust Pie dough mix Makes: enough for 2 double-crust 9-inch pie crusts or 23 mini 4-inch pie shells
5 cups (25 ounces) all-purpose flour
2 teaspoons salt
Mix both ingredients in a large bowl. Store in a container for later or give away.
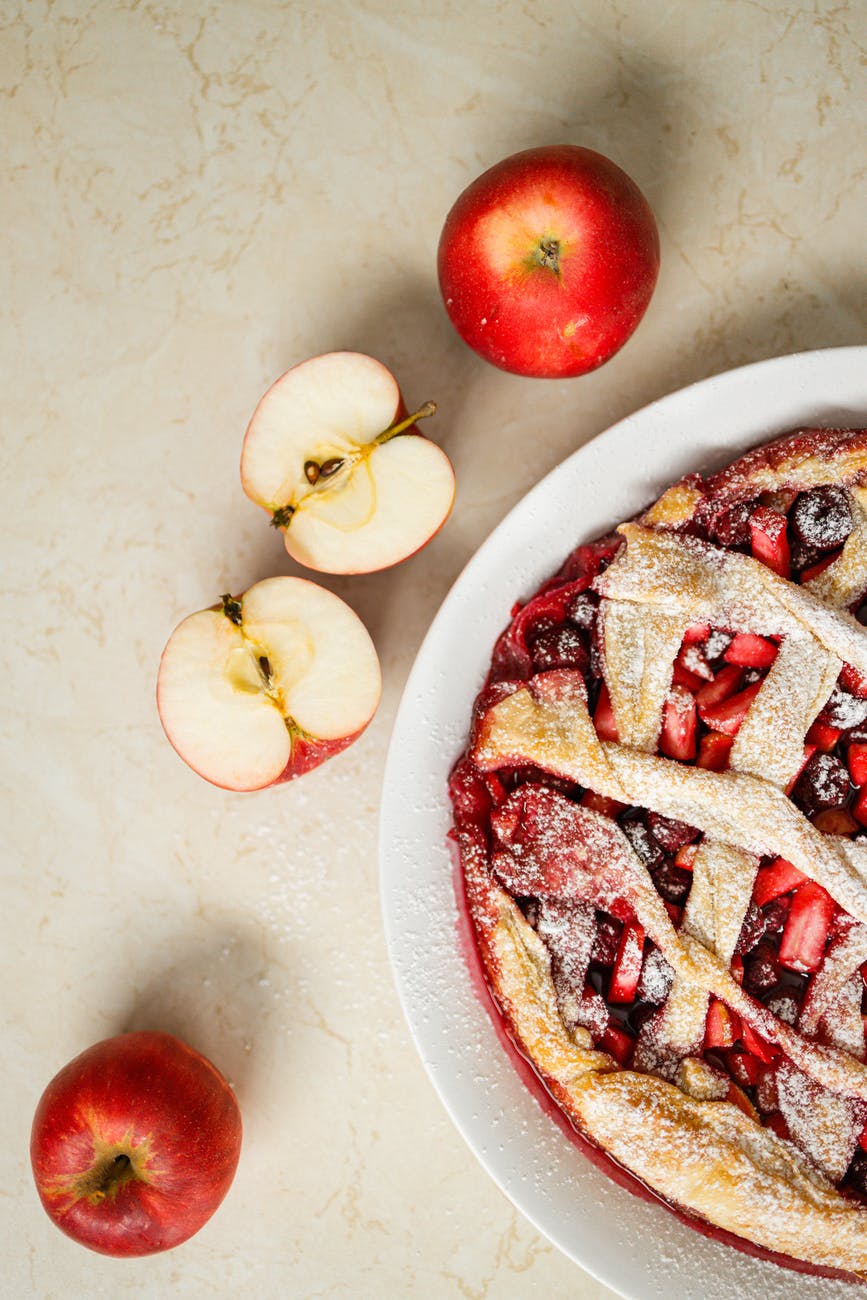
All-butter Double-Crust Pie dough Makes: enough for one double-crust 9-inch pie
Mixing the sour cream with the water ensured that it was evenly distributed throughout the dough. It was essential to make sure our dough was evenly divided into two even pieces so that the bottom and top crusts were of equal size and could be properly crimped together. When making a lattice crust, it was helpful to freeze the strips of dough briefly to make them easier to handle.
⅔ cup ice cold water, plus extra as needed
6 tablespoons sour cream
1 All-Butter Double-Crust Pie Dough mix
28 tablespoons (3 ½ sticks) unsalted butter, cut into ¼ inch pieces and chilled
Whisk ice cold water and sour cream together in a bowl. Place the mix in a food processor. Scatter chilled butter over top and pulse until butter is the size of small lentils, about 10 pulses. Drizzle half of sour cream mixture over the top and pulse until incorporated, about 3 pulses; repeat with the remaining sour cream mixture.
Pinch the dough with your fingers. If the dough feels dry and does not hold together, add 1 to 2 tablespoons more ice water and pulse until dough forms large clumps and no dry flour remains, 3-5 pulses.
Divide the dough into 2 even pieces. Form each piece into a 4 inch disk, wrap tightly in plastic wrap and refrigerate for 1 hour. Before rolling the dough out, let it sit on the counter to soften slightly for about 10 minutes. (The dough can be refrigerated for up to 2 days or frozen for up to 2 months. If frozen, let the dough thaw completely on the counter before rolling.)
Roll 1 piece of dough into a 12-inch circle on a lightly floured counter. Loosely roll the dough around the rolling pin and gently unroll it on to the 9-inch pie plate, letting the excess dough hang over the edge. Ease dough into the plate by gently lifting the edge of dough with your hand while pressing into the bottom with your other hand. Wrap loosely in plastic wrap and refrigerate until the dough is firm, about 30 minutes.
For A Traditional Top Crust: Roll the second piece of dough into a 12-inch circle on a lightly floured counter, transfer to parchment paper-lined baking sheet and cover with plastic. Refrigerate for 30 minutes.
For A Lattice Top Crust: Roll the second piece of dough into a 13 ½ by 10 ½-inch rectangle on a generously floured counter, thentransfer to a parchment paper-lined baking sheet. Trim the dough to 13 by 10-inch rectangle and slice lengthwise into ten 13-inch-long strips. Separate the strips slightly and cover with plastic. Freeze until very firm, about 30 minutes.
Note: This recipe could be used to make french apple pies, blueberry pie and lemon meringue pie
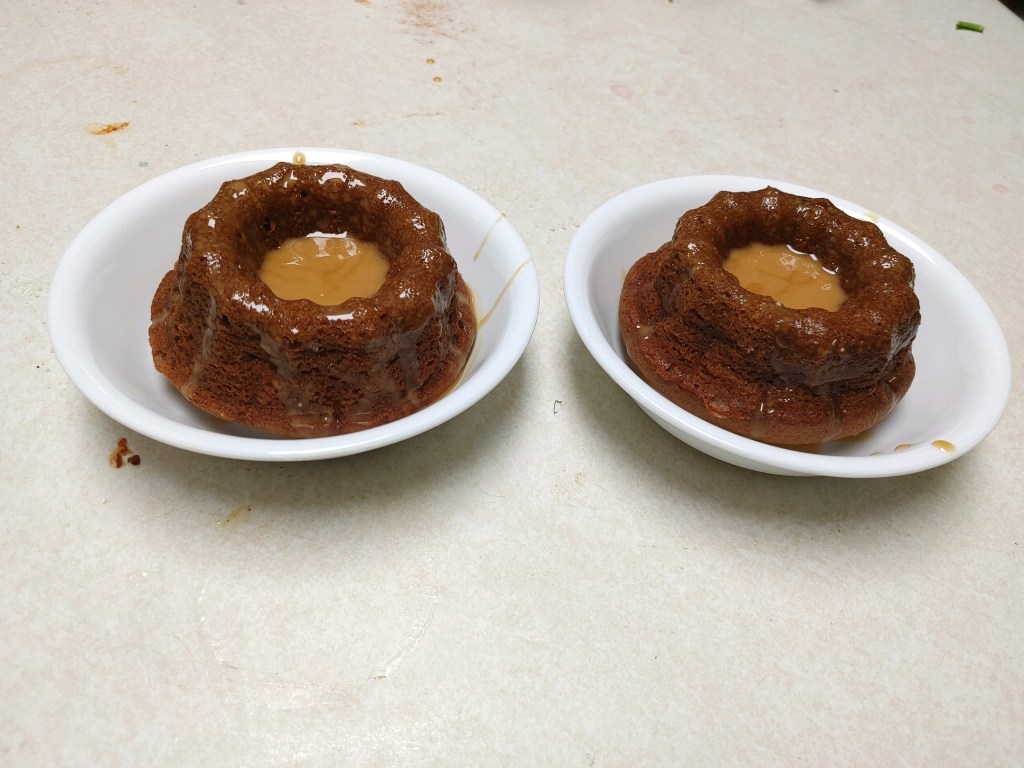
BLACK RUSSIAN CAKE Preheat: 350℉, Bake: 30 minutes, Makes: 8 mini bundt cakes
1 yellow cake mix (without the pudding)
1 pkg. Instant chocolate pudding (3 oz.)
4 eggs
1 cup (2 sticks) butter
¾ cup water
¼ cup vodka
¼ cup kahlua
A dash of vanilla extract
Extra kahlua or raspberry liquor for the drizzle
Preheat the oven at 350℉. Grease and flour a tube pan. Mix well together and pour the batter into the pan. Bake for 30 minutes for mini bundt pans or until a toothpick comes out clean. When the cake is cool, drizzle over with powdered sugar and extra kahlua.
Copyright
This recipe was adapted from the Black Russian Cake Recipe found in the COOKING WITH LICA LADIES (LAND IMPROVEMENT CONTRACTORS OF AMERICA) cookbook of 1988
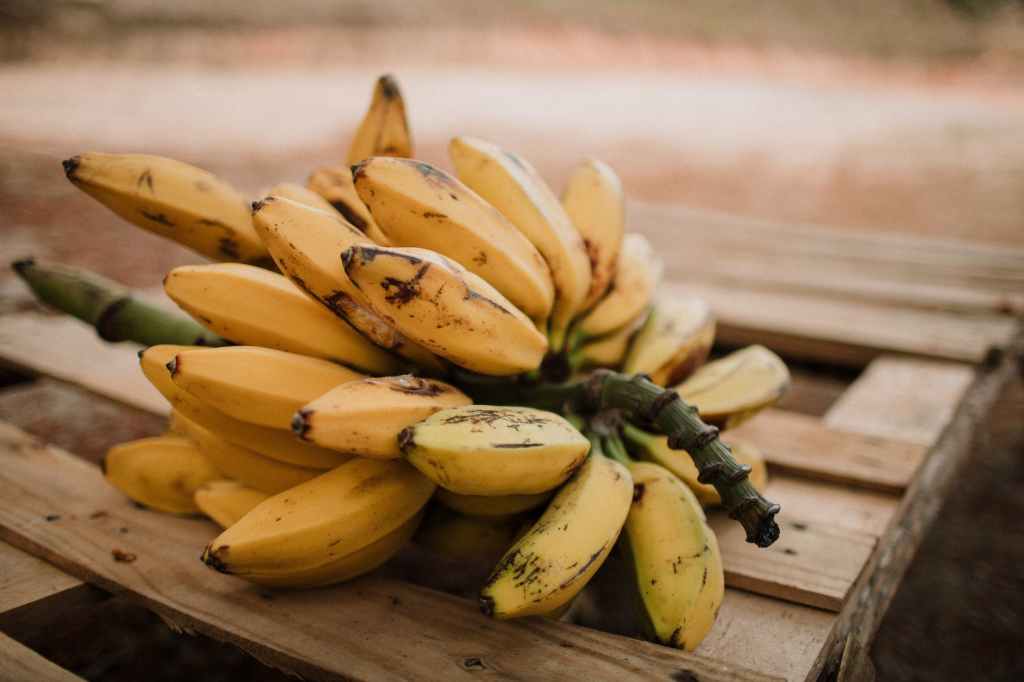
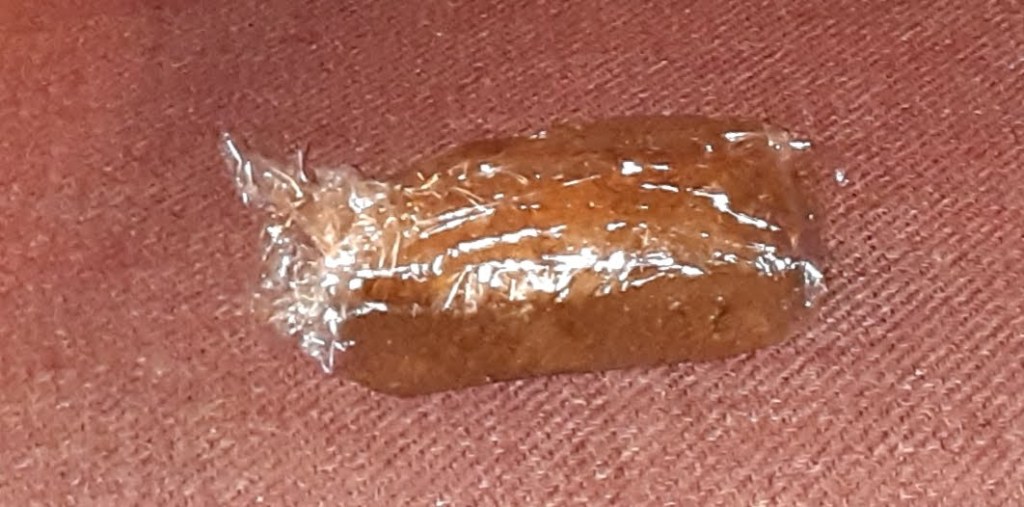
Every year, I make homemade Christmas gifts to give out to people I see everyday. This year, I made 24 mini loafs of zucchini banana bread.
To make up to 24 mini loafs, you may need only up to 1 1/2 times the recipe as this recipe makes 2 8″x4″ loafs of bread.
I have learned, through making this bread mix recipe and zucchini banana bread recipe, that the volume changes as the dimensions of the pan changes.
I made 3 times the recipe, thinking I needed that much to make 24 mini loafs of bread. However, since I needed only 1 1/2 times the mix recipe, I had an extra 1 1/2 mixes left.
I gave away, to a neighbor of mine, the bag of mix for 1 whole batch the needed zucchini and bananas as she let me borrow her grater.
Zucchini Banana Bread Mix
2 c. white sugar
3 cups all-purpose flour
1 1/2 tsp baking powder
1 1/2 tsp baking soda
1 1/2 tsp cinnamon
Mix all the ingredients in a large bowl. Store in a gallon size ziploc bag or a large container for later.
Zucchini Banana Bread
Preheat: 350 degrees Farenheit
Bake: 1 hour
Makes: 2 (8″ x 4″) loaves
Ingredients
1 Zucchini Banana Bread Mix
4 eggs
1 cup canola oil
1 1/2 cups shredded zucchini
2 bananas
Directions:
Preheat the oven to 350 degrees Farenheit. Grease two 8″ x 4″ bread pans.
Mix all the ingredients together in a large mixing bowl. Pour the batter evenly between the two prepared pans.
Bake for 1 hour.
Let the bread loaves cool before using a knife around the edge.
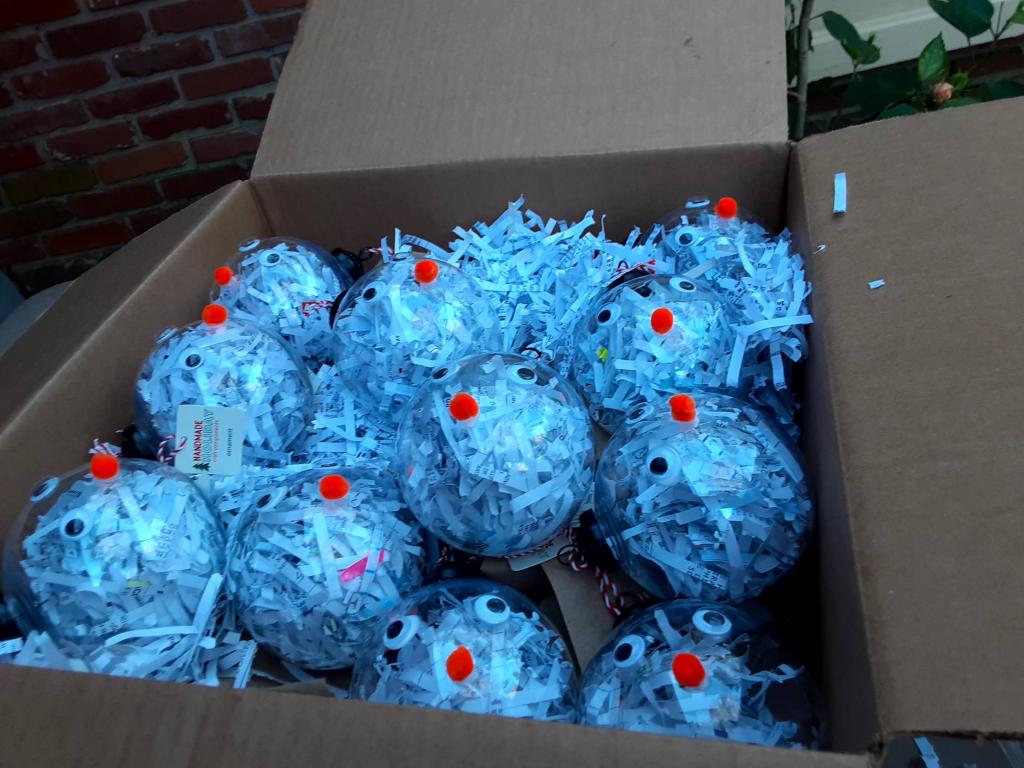
Last year, I got 11 giant plastic ornaments, which had a little black thing to go around the wire reminded me of an updated version of Frosty the Snowman’s hats, which was a beanie hat.
So this year, I made Frosty the Snowman ornaments with the little beanie hat on top.
Here is what is needed to make each Frosty the Snowman ornaments.
Supplies:
1 plastic ball ornament
Shredded white paper
2 wiggle eyes
1 orange pom-pom
elmer’s glue
Instructions:
1.) Take the wire out and stuff the ornament with white paper.
2.) Squeeze three dots of glue, spaced in an even triangular pattern, on the ornament.
3.) place the two wiggle eyes on the ball ornament, from left to right.
4.) place the orange pom-pom on the ball ornament, where the nose goes.
5.) let the ornaments dry with the nose pointed upwards.
Any child can make this ornament with the supervision of an adult.
I adapted this recipe from another recipe on the internet.
CHOCOLATE PUFF PUFF MIX Makes: 1 mix for about 21 balls
4 cups Bob’s Red Mill 1-to-1 Gluten-Free Baking Flour
1 cup Cacao Powder
1 1/2 cups Coconut Sugar
1 tsp Baking Powder
⅛ tsp Nutmeg
¼ tsp Sea Salt
Place the flour in a gigantic bowl. Sift in the cocoa powder. Mix in the rest of the ingredients with a fork until it incorporates all the ingredients.
Place in a storage container for later or place in a jar, labeled with the jar contents and the date you made the mix. Then give the jar away.
DESCRIPTION: A twist on a classic Nigerian street food, this Chocolate Puff Puff has a crispy exterior combined with a rich & fluffy chocolate inside! Gluten-Free & Vegan.
For the Batter:
1 CHOCOLATE PUFF PUFF MIX
½ cup Full Fat Coconut Milk (from a can)
1 ½ cup Filtered Water
1 tsp Vanilla Extract
For Cooking and Serving:
Sunflower Oil for Deep Frying
2 tbsp Coconut Sugar
3 tbsp Maple Syrup
¼ cup Shredded Coconut, toasted
Fill a large, deep pot with oil until it’s between 3-5 inch deep. Heat the oil over medium-high heat while you prepare the Puff Puff batter; you want it to get to around 300F. In the meantime, place the mix in a gigantic bowl. Form a well in the center of the bowl and pour in the remaining wet ingredients. Mix the batter together until everything combines and uniformed. Once the oil heat to 300 degrees Fahrenheit, use a small cookie or ice cream scooper to drop 3 tbsp balls of dough into the hot oil. Depending on the size of your pot, you will need to do this in 2-3 batches. Raise the heat to high and then fry the Puff Puff for 5-6 minutes, stirring occasionally to ensure that the dough balls cook evenly and do not stick together. The balls will have a crisp exterior and will make a “hollow” sound to them when you tap them–that’s when you know they’re done! Use a slotted spoon to transfer the Puff Puff to a plate lined with a paper towel or clean dish cloth. Immediately sprinkle the balls with Coconut Sugar and top with toasted Coconut. Drizzle with Maple Syrup and then serve them while warm.
NOTES: You can substitute the Coconut Sugar with another granulated sweetener. We only used the gluten-free all-purpose flour during the testing of this recipe.
I adapted and tested this recipe from another recipe found in the most unusual places, the back of a murder mystery book titled “MING TEA MURDER” written by Laura Childs. The book itself is A TEA SHOP MYSTERY book with recipes and tea time suggestions at the back of the book.
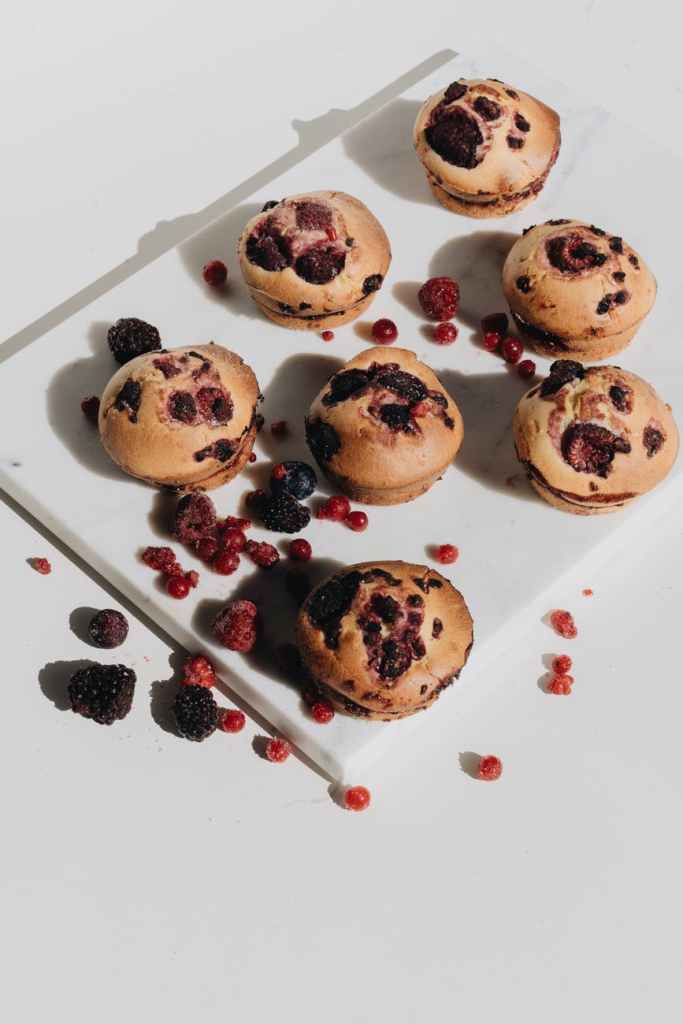
If you want to prepare ahead of time for afternoon tea or just want to give away a homemade muffin mix, with the Blueberry Sour Cream Muffins as a gift, then this recipe is for you.
Muffin Mix 1Makes: 1 (12 muffin) mix
2 cups flour
½ tsp. Salt
½ tsp. Baking soda
Mix all ingredients in a gigantic bowl. Put the mix in a storage container to use later or label a mason jar and give it away with the below recipe.
If giving as a gift, be sure to label the jar with the recipe title and the date of the day you made the mix.
Preheat the oven to 400℉. Beat eggs, gradually adding sugar, in an enormous bowl. Continue beating and pour in the oil and vanilla. Incorporate the mix into the egg mixture. Stir the dry ingredients into egg mixture, gradually incorporating the sour cream. Gently fold in the blueberries. Scoop the batter into a greased muffin tin. Bake for 20 minutes.
*vanilla extract is available as a dry ingredient. One brand of Organic Vanilla Extract Powder is COOK’S, which is available on Amazon.com and walmart.com. I also find it is also at cooksvanilla.com.
You can use the following recipes all year round. Some of these recipes are children friendly to make. The sugar cookies, for example, have sprinkles as an option to add that will appeal to children.
All of these mixes can be stored in an airtight container and mad later. Each mix recipe comes with another recipe that uses the mixes. All recipes can be used to give gifts either by giving a cellophane bag of the mix accompanied by the recipe that uses it or by creating and wrapping the final product that the mix is used in.
Homemade Pumpkin Bread made from Homemade Pumpkin Bread Mix
This homemade pumpkin bread mix is based and inspired by a recipe I found in a magazine called “THE GOOD OLD DAYS” November/December 2019 Issue.
HOMEMADE PUMPKIN BREAD MIX This moist quick bread is ideal for Thanksgiving or Christmas. Dust with confectioner’s sugar before serving. This mix can be stored or given. Makes: enough for 2 large loaves or 8 mini loaves
Ingredients:
3 1/2 cups flour
2 tsps. Baking Soda
2 tsps. cinnamon
2 tsps. grated nutmeg
1/2 tsp. ground cloves
1/4 tsp. ground ginger
1/4 tsp. allspice
Whisk everything in a large mixing bowl.
This following recipe uses the HOMEMADE PUMPKIN BREAD MIX as an ingredient.
HOMEMADE PUMPKIN BREAD Preheat: 350 degrees farheinheit, Baking time: 50-60 minutes, Yields: 2 9x5x3 in loaves or 8 mini loaves
1 HOMEMADE PUMPKIN BREAD MIX
1 (15-ounce) can pumpkin puree
4 large eggs
1 cup salted butter, melted and cooled*
2/3 cup water
2 cups white sugar
1 cup light brown sugar
Instructions:
Preheat oven to 350 degrees Farheinheit. Grease 2 9x5x3-inch loaf pans or 8 mini loave pans with cooking (Pam baking) spray or grease and then flour. (With Pam baking spray there is no need to flour as it already contains flour.)
In a medium bowl, place the mix. set aside.
In a large bowl, place the pumpkin puree, eggs, butter, water and both sugars. Using an electric mixer on low speed, gradually add dry mix, mixing just until combined. do not overmix.
Divide the batter evenly between all of the prepared pans. bake for 50-60 minutes or until toothpick inserted in the center comes out clean. cool in the pans on wire racks for 10 minutes before running a knife around the edge to remove from the pans. This bread freezes well.
*If Salted Butter is not available, use 1 1/2 tsps. salt.
Place bread in clear cellophane bags. Use the enclosed cellophane bag twist ties.
Rudolph the Red Nose Reindeer Ornaments picture taken by Karen Loraine
When I saw a picture of glass ball ornaments of the words Rudolph and the other reindeer names, I had to make these.
Supplies neededfor 1 Rudolph ornament:
1 clear glass ball
2 googlie eyes
1 red pom-pom
1 brown or gold pipe cleaner
Shredded brown construction paper (shredded with a regular paper shredder)
Glue (Sobo is a better craft glue. It dries clear and never yellow with age)
paintbrush
paper plate or newspaper
Directions:
1.) Set up your workspace area with the supplies above.
2.) Place some glue on the paper plate or newspaper.
3.) Take the metal pieces of the ornament and stuff the ornament with enough shredded construction paper, but do not overcrowd the paper (we mean it to show). Place the metal pieces back on the ornament.
4.) Dip the paintbrush in the glue and paint the back of each eye. Place both eyes onto the glass ball.
5.) Dip the red pom-pom into the glue and place below (right between) the eyes. This becomes the nose.
6.) Dip the paintbrush back into the glue and paint the metal cover (not the hanger) and the immediate surrounding area with the glue. Find the middle of the pipe cleaner and place it dead center against the metal, touch the glass and the metal at the same time. Wrap the pipe cleaner around the metal piece one time and twist the pipe cleaner in the back. The pipe cleaner is the antlers.
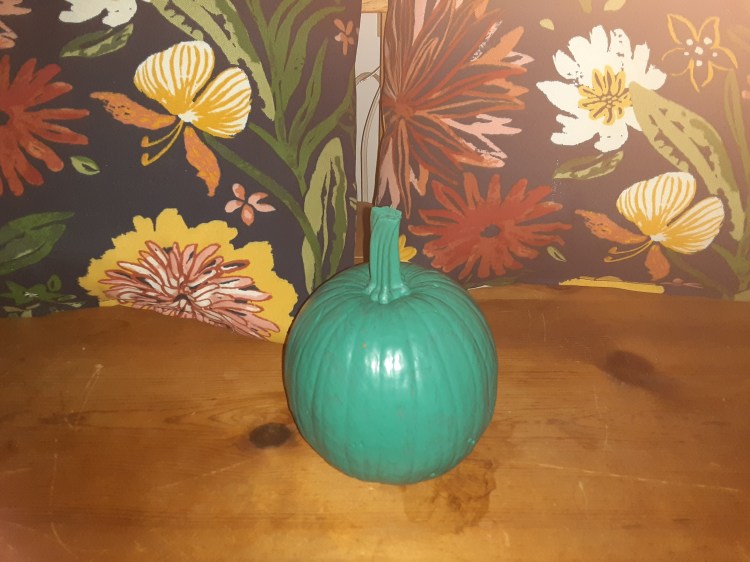
Foodallergy.org is a website that promotes the TEAL PUMPKIN PROJECT, a safer way for parents with children, who have food allergies, to know that a particular house is a safe place for their child to trick-or-treat on Halloween.
For all the rules of the TEAL PUMPKIN PROJECT, go to foodallergy.org.
The Teal pumpkin on your front stoop, seen from the street, signifies that the only items available to the tricker-treaters at your house are non-food items.
The following project will show you one way of painting a pumpkin teal.
Supplies needed:
1 pumpkin, large enough to view from the street
1 paint brush
blue acrylic paint
green acrylic paint
white acrylic paint
1 palette
newspaper
paper towels
1 cup of water
Instructions:
Setup your workspace area to your liking.
Mix 5 parts blue paint and 5 parts green paint to create the teal color. Mix in a little white paint at a time to create the teal shade of your choice.
Use the paintbrush to brush strokes of paint all over the pumpkin except where the pumpkin touches the newspaper.
Let the paint on the pumpkin dry before dabbing wet paint on the areas of thin paint.
Depending on the size of the pumpkin, words could be painted as well. For example: we are allergy friendly or non-food treats here.
Let the pumpkin dry completely.
Set the pumpkin out on the front stoop in a place where the pumpkin could be viewed from the street.
Get ready for trick-or-treaters.
Getting ready for Trick-or-Treaters:
There are many items to choose from that could be handed out at Halloween. Here are just a few ideas of items that could be handed out to all trick-or-treaters:
unsharpened pencils,
erasers,
glow sticks,
glow bracelets,
or little trinket goodie bags.
All of these items could become “treats” for Halloween. What other non-food items could you think of handing out?
This is the first post on my new blog. I’m just getting this new blog going, so stay tuned for more. Subscribe below to get notified when I post new updates.
My name is Karen Loraine, owner of craftsasgifts.com. The purpose of Crafts As Gifts is to help promote and encourage new ideas of how to make gifts with what is already at home. This includes: gardening, crafts, and food recipes.
Why do this?
Here are some reasons why this blog is here:
1.) Teach the young and the elderly alike that, whatever your skill sets or expertise may be, gifts could be made in the home and not have to spend money on gas in addition to buying gifts.
2.) Quality control of ingredients and craft supplies will be controlled by the person who makes the homemade gifts. For example: having a garden means that the quality and quantity of herbs, fruits, vegetables and flowers are under your control. What you put in your garden is what comes out of your garden. If you have an organic garden plants that grew from heirloom seeds, then organic heirloom garden plants are going to come out of that garden.
3.) Awareness of just how versatile of the kitchen and garden items is not what it used to be. For example: many know that lavender could be used in some crafts like wreaths, scent homemade carpet fresheners, and homemade air fresheners. However, awareness of the food items the lavender flowers could be used as an ingredient in has gone down (Lavender Cookies).
I hope to connect with crafters and non-crafters alike, regardless of age. This includes the home cook (who does not mind doing the work and save money at the same time), the crafter (who likes to try out new skills) and the gardener (who knows that the plants can be more than just pretty, however, does not realize just how versatile the usage of the plants are.)